
Reinforced Retaining Wall - Intro
This a a quick post to show some pictures of a reinforced retaining wall, along with a little non technical description, along the way.
A retaining wall is generally a wall you would build to avoid having a steep slope, or where you want to have a change in ground levels without a slope. Opting for a step instead. Retaining walls can be just a few feet high, or many meters.
Reinforced Retaining Wall - Basic Concept
If you were to stand a domino on its end, it could be easily pushed over. If however, you were to super glue the domino to a heavy table, it would a a lot harder to push over. Provided the glue were strong enough you would have to tip the table over to get the domino to topple.
In the same sense a concrete wall, can be easily pushed over by heavy soil pushing against it from one side, so we must attached the concrete wall to something heavy to stop it moving.
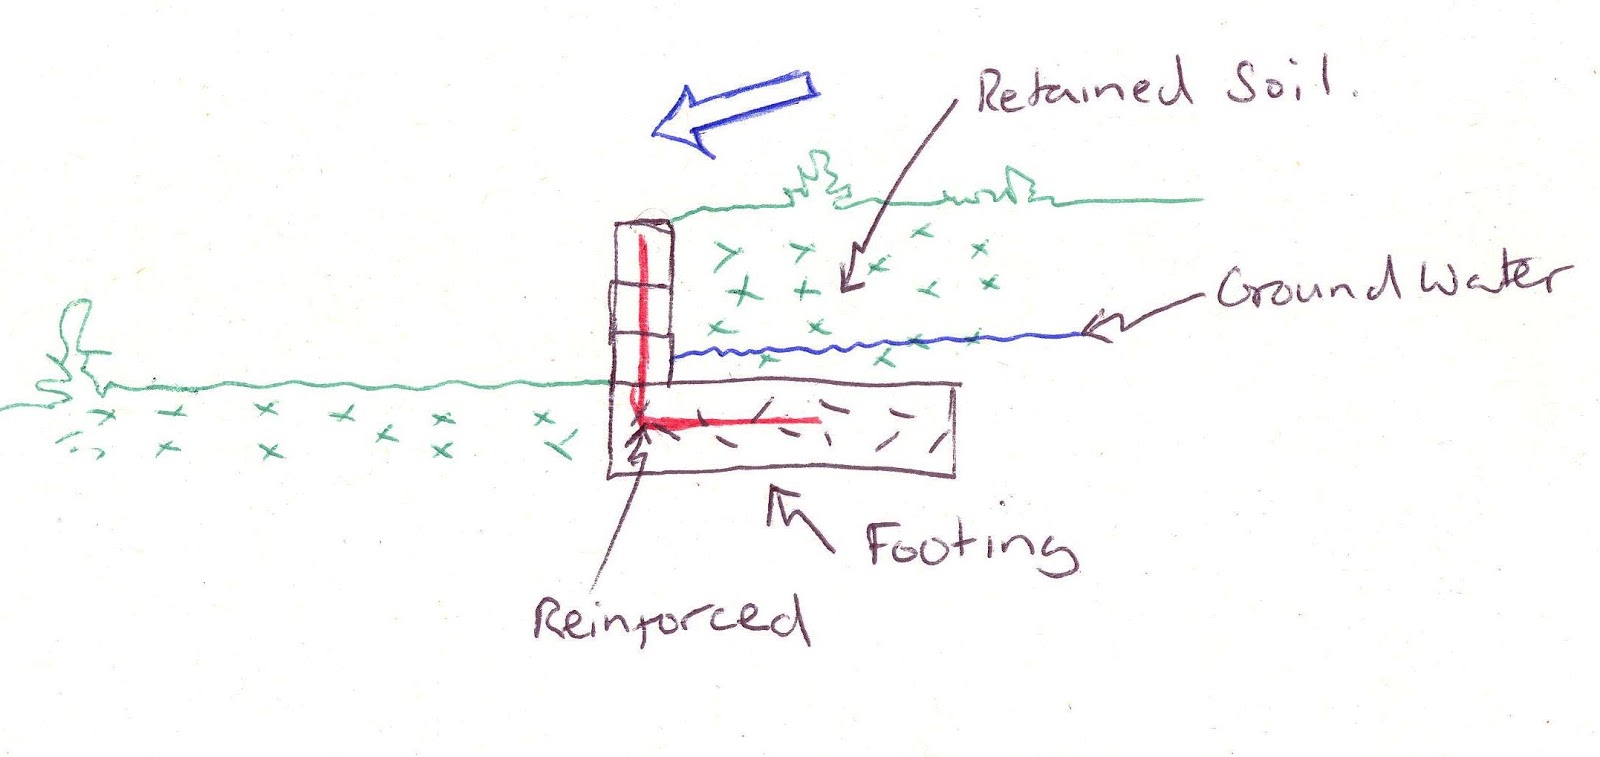
So we anchor the concrete block wall to a concrete slab. This is done by setting steel bars in the concrete footing, as shown above. The soil will try to push the wall, but with the weight of footing and the soil resting on top of the footing it will not move (providing the soil under the footing is not too squishy - a geotechnical investigation would determine this).
It is also important to let the ground water drain out from behind the wall. Gaps or pipes must be included to allow this.
Reinforced Retaining Wall - Case Study
In the below picture you can see the footing for the retaining wall has been cast, and the steel bars (rebar) are left poking up, ready for the wall to be attached to.

Next up the block wall is built up around the rebar. The block are hollow as they will be filled with concrete at a later date. Another option would be to build a wooden mould (shuttering) around the rebar and pour concrete in to the mould to make wall.

As the wall is built horizontal bars are added, these are tied with thin wire to the vertical bars to keep them in place.

You can see here how the wall is built to one side of the footing. This helps keep the wall stable, as it will be loaded from (in this picture) the left hand side.

You can see more clearly here the thin wire sued to hold the bars in place prior to pouring the concrete.

On a very long wall such as this one you will need to have expansion gaps, these are breaks in the wall filled with squashy (compressible) material that allow the wall the expand and shrink when it get hotter and colder.
Reinforced Retaining Wall - A Simple DIY Design
This retaining wall as pictured was likley designed by an engineer. And it is next to a railway so it is a very high quality, probably over specified retaining wall.
For DIY purposes retaining walls can be built without reinforcement, from normal concrete blocks sometimes without any footings. But drainage is still very important.
A method I have tried is a a thin strip footing topped with a concrete block wall. The blocks are laid on there side, and can be sloped gently back towards higher ground. If you do slope the wall back fill as you go. Gently pack the soil behind the wall. Every 4 or 5 block insert a length of 50mm drainage pipe between the blocks to allow of drainage.
This comment has been removed by a blog administrator.
ReplyDelete